Hello World
The quintessential place to start writing an AngularJS app is with a hello world application. To write our hello world application, we’ll start with the simplest, most basic HTML we can possibly write.
We’ll take a more in-depth look into AngularJS as we dive into the framework. For now, let’s build your hello world application.
<!DOCTYPE html>
<html ng-app>
<head>
<title>Simple app</title>
<script
src="https://ajax.googleapis.com/ajax/libs/angularjs/1.2.6/angular.js">
</script>
</head>
<body>
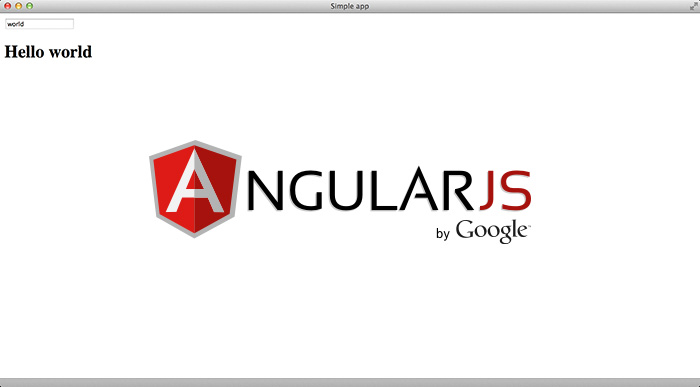
<input ng-model="name" type="text" placeholder="Your name">
<h1>Hello {{ name }}</h1>
</body>
</html>
Although this demo isn’t incredibly interesting or exciting, it does show one of the most basic and impressive features of AngularJS: data binding.
Introducing Data Binding in AngularJS
In classic web frameworks, such as Rails, the controller combines data from models and mashes them together with templates to deliver a view to the user. This combination produces a single-way view. Without building any custom JavaScript components, the view will only reflect the data the model exposes at the time of the view rendering.
AngularJS takes a different approach. Instead of merging data into a template and replacing a DOM element, AngularJS creates live templates as a view. Individual components of the views are dynamically interpolated live. This feature is arguably one of the most important in AngularJS and allows us to write the hello world app we just wrote in only 10 lines of code without a single line of JavaScript.
This feature works by simply including angular.js in our HTML and explicitly setting the ng-app attribute on an element in the DOM. The ng-app attribute declares that everything inside of it belongs to this Angular app; that’s how we can nest an Angular app inside of a web app. The only components that will be affected by Angular are the DOM elements that we declare inside of the one with the ng-app attribute.
Without getting into the source (available at AngularJS.org), Angular simply remembers the value that the model contains at any given time (in our example from hello world, the value of name).
When Angular thinks that the value could change, it will call $digest() on the value to check whether the value is “dirty.” Hence, when the Angular runtime is running, it will look for potential changes on the value.
This process is dirty checking. Dirty checking is a relatively efficient approach to checking for changes on a model. Every time there could be a potential change, Angular will do a dirty check inside its event loop to ensure everything is consistent.
When using frameworks like KnockoutJS, which attaches a function (known as a change listener) to the change event, the process is significantly more complex and relatively more inefficient. Dealing with change coalescence, dependency tracking, and the multitude of event firing is complex and often causes problems in performance.
AngularJS removes the need to build complex and novel features in JavaScript in order to build fake automatic synchronization in views.
Simple Data Binding
To review the code we just wrote, what we did was bind the “name” attribute to the input field using the ng-model directive on the containing model object ($scope).
All that means is that whatever value is placed in the input field will be reflected in the model object.
Bi-directional in this context means that if the view changes the value, the model observes the change through dirty checking, and if the model changes the value, the view update with the change.
To set up this binding, we used the ng-model function on the input, like so:
<input ng-model="person.name" type="text" placeholder="Your name">
<h1>Hello {{ person.name }}</h1>
Now that we have a binding set up (yes, it’s that easy), we can see how the view changes the model. When the value in the input field changes, the person.name will be updated and the view will reflect the change.
Now we can see that we’re setting up a bi-directional binding purely in the view. To illustrate the bi- directional binding from the other way (back end to front end).
Just as ng-app declares that all elements inside of the DOM element upon which it is declared belong to the Angular app, declaring the ng-controller attribute on a DOM element says that all of the elements inside of it belong to the controller.
To declare our above example inside of a controller, we’ll change the HTML to look like:
<div ng-controller='MyController'>
<input ng-model="name" type="text" placeholder="Your name">
<h1>Hello {{ name }}</h1>
</div>
In this example, we’ll create a clock that will tick every second (as clocks usually do) and change the data on the clock variable:
function MyController($scope) {
var updateClock = function() {
$scope.clock = new Date();
};
setInterval(function() {
$scope.$apply(updateClock);
}, 1000);
updateClock();
};
In this example, as the timer fires, it will call the updateClock function, which will set the new $scope.clock variable to the current time. We can show the clock variable that’s attached on the $scope in the view simply by surrounding it in {{ }}:
<div ng-controller="MyController">
<h5>{{ clock }}</h5>
</div>
At this point, our sample web app looks like:
<!doctype html>
<html ng-app>
<head>
<script src="https://ajax.googleapis.com/ajax/libs
/angularjs/1.2.0-rc.2/angular.js"></script>
</script>
</head>
<body>
<div ng-controller="MyController">
<h1>Hello {{ clock }}!</h1>
</div>
<script type="text/javascript">
function MyController($scope) {
$scope.clock = new Date();
var updateClock = function() {
$scope.clock = new Date();
};
setInterval(function() {
$scope.$apply(updateClock);
}, 1000);
updateClock();
};
</script>
</body>
</html>
The above code will change to:
<!doctype html>
<html ng-app>
<head>
<script src="https://ajax.googleapis.com/ajax/libs/
angularjs/1.2.0-rc.2/angular.js">
</script>
</head>
<body>
<div ng-controller="MyController">
<h1>Hello {{ clock }}!</h1>
</div>
<script type="text/javascript" src="js/app.js"></script>
</body>
</html>
We will place the JavaScript from above in the js/app.js file instead of embedding it directly into the HTML.
// In app.js
function MyController($scope) {
$scope.clock = new Date();
var updateClock = function() {
$scope.clock = new Date();
};
setInterval(function() {
$scope.$apply(updateClock);
}, 1000);
updateClock();
};
Best Data Binding Practices
Due to the nature of JavaScript itself and how it passes by value vs. reference, it’s considered a best- practice in Angular to bind references in the views by an attribute on an object, rather than the raw object itself.
If we were to apply best practices to the clock example above, we’d change the usage of the clock in our view to:
<!doctype html>
<html ng-app>
<head>
<script src="https://ajax.googleapis.com/ajax/
libs/angularjs/1.2.5/angular.js"></script>
</head>
<body>
<div ng-controller="MyController">
<h1>Hello {{ clock.now }}!</h1>
</div>
<script type="text/javascript" src="js/app.js"></script>
</body>
</html>
In this case, rather than updating the $scope.clock every second, we can update the clock.now property. With this optimization, we can then change our back end to reflect the change with:
// In app.js
function MyController($scope) {
$scope.clock = {
now: new Date()
};
var updateClock = function() {
$scope.clock.now = new Date()
};
setInterval(function() {
$scope.$apply(updateClock);
}, 1000);
updateClock();
};
You have to attribute CreativeAlys for free design resources you download from this website.
Design by creativealys.com
Copy the above line and paste it in a visible place, close to where you’re using the design resource.